Charging Theragun Battery in 2026 should be simple, but small mistakes can reduce convenience and battery life. Theragun models may use different charging docks, USB-C connections, or proprietary adapters. Always check the model label and current user manual before connecting power. The correct charger matters more than speed.
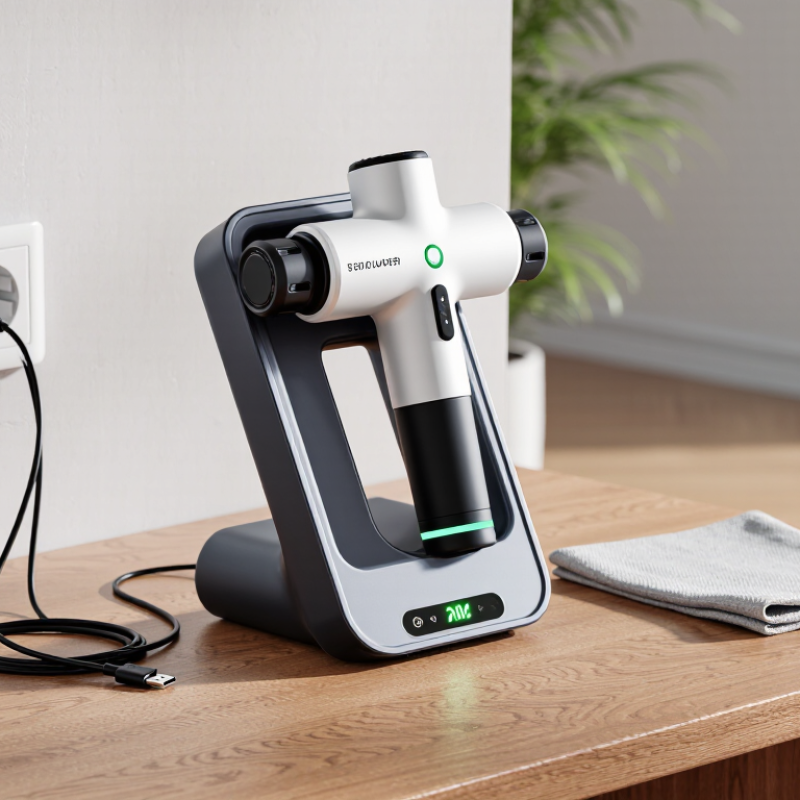
Place the device on a stable, dry surface near a suitable outlet. Inspect the cable for cuts, loose connectors, or unusual heat. When the Theragun sits correctly in its charging stand, its indicator should show charging activity. A blinking light usually signals power, but the exact meaning can vary by model. Do not rely on memory alone. Verify the light pattern in the official documentation.
Charging Theragun Battery works best at room temperature. Avoid charging it beside a heater, in direct sunlight, or under blankets. Disconnect the charger after the battery reaches full capacity if the manual recommends it. Some newer devices manage charging electronically, yet that does not make damaged accessories safe. Never force a connector. Something may be wrong.
I have seen users blame the battery when the real issue was a loose dock or dusty contact points. Wipe contacts gently with a dry, soft cloth, then test again. If the device becomes unusually hot, smells burnt, or refuses to charge, stop using it and contact Therabody support. This guide explains practical checks, model differences, charging indicators, and safer habits for 2026. It also acknowledges an uncomfortable truth: battery behavior is not always predictable. Careful observation remains essential.
Before charging, identify the exact device model. Check the small label near the handle, battery compartment, or charging socket. Record the model number, input voltage, connector shape, and polarity. Do not rely on appearance alone. Two similar massage devices may use different batteries or charging systems.
Use the charger listed in the manual or on the manufacturer’s support page. Its voltage must match the device’s required input. The connector must fit firmly, without force or looseness. A USB-C plug does not guarantee compatibility. Some ports accept only standard charging, while others require power-delivery negotiation. IEC 62133-2 defines safety requirements for rechargeable lithium batteries, but compliance does not make every charger suitable. The International Energy Agency reported that global battery demand exceeded 750 GWh in 2023, rising about 40 percent in one year. That growth makes careful charger matching more important, not less.
Tips: Photograph the label before ordering. Check for swelling, heat, or a damaged cable. Stop charging immediately if any appears. Keep the device on a hard, visible surface. Never cover it with clothing or bedding. I once assumed a higher-output adapter would charge faster; that assumption was incomplete. The device’s internal charging circuit controls the process. A higher rating may be acceptable, but only when the voltage and charging protocol match. When uncertain, replace the charger through an authorized service channel rather than guessing.
Before charging, check the port, voltage, and polarity printed on the device or original adapter. USB-C models should use a compatible USB-C cable and a charger that meets the device’s required input. Older models with a round DC connector require an adapter with the same voltage, polarity, and connector size. Do not substitute chargers based only on plug shape.
Before charging, switch off the percussive therapy device and examine the battery carefully. Check for swelling, cracks, leaking fluid, or an unusual smell. Do not charge a damaged battery. Wipe the contacts with a dry, soft cloth, and keep the charging area free from dust and moisture. Let a cold or overheated battery return to room temperature. This small pause matters.
Use the charger supplied for the device, or one that matches its required voltage and connector. Never force the plug into place. Set the battery on a stable, nonflammable surface with clear space around it. Avoid beds, sofas, enclosed drawers, and direct sunlight.
Connect the charger firmly, then check that the indicator light behaves normally. If the light stays off, flickers strangely, or the charger becomes unusually hot, unplug it and inspect the setup.
The tempting shortcut is using any spare adapter. That choice can create avoidable risk. Follow the latest instructions for your specific battery model, because charging designs can differ.
Tips: Charge while you are awake and nearby. Keep liquids away. Do not cover the charger. Avoid using the device during charging unless its instructions clearly permit it. After charging, disconnect the power and store the battery in a cool, dry place. I would rather wait a little longer than ignore a warning sign.
Place the device on a dry, stable surface before charging. Inspect the cable, adapter, and charging port for dust or damage. Connect the approved charger firmly, then plug it into a suitable wall outlet. The status light should show charging activity, but its color and pattern can vary by model. Check the user manual instead of guessing.
Monitor the process during the first few minutes. A lithium-ion battery normally uses constant-current and constant-voltage charging, as explained in Battery University’s technical guidance. The device may become slightly warm, but stop charging if it becomes unusually hot, smells strange, or swells. Do not cover it with clothing or leave it beside moisture. IEC 62133-2 emphasizes controlled charging and protection for portable lithium-ion batteries. Those details matter, even for a small recovery device.
Tips: Charge at room temperature. Keep the port clean. Use the supplied charger. Avoid repeated overnight charging when practical. The 2024 Global E-waste Monitor reports 62 million tonnes of electronic waste in 2022, with only 22.3% formally collected and recycled. Extending battery life reduces unnecessary replacement waste. I used to treat a blinking light as proof of progress. That assumption was weak. Watch the indicator, feel for abnormal heat, and confirm completion through the manual.
| Step | Charging Task | What to Do | What to Monitor | Expected Result | Safety Check |
|---|---|---|---|---|---|
| 1 | Check the Battery and Charger | Inspect the battery compartment, charging port, cable, and power adapter for visible damage, moisture, or debris. | Look for bent contacts, frayed cables, loose connectors, or unusual odors. | Ready to Charge | Do not use damaged or wet charging equipment. |
| 2 | Use the Correct Charger | Use the charger supplied for the device or an approved replacement with matching voltage, connector type, and electrical specifications. | Confirm that the adapter rating matches the device requirements shown on its label or manual. | Compatible Connection | Avoid unverified adapters, modified cables, or incompatible fast-charging equipment. |
| 3 | Prepare the Charging Area | Place the device on a stable, dry, nonflammable surface with clear airflow around the charger and battery. | Keep the battery away from direct sunlight, heaters, water, and enclosed spaces. | Safe Position | Charge at normal indoor temperatures; avoid charging a hot, frozen, swollen, or leaking battery. |
| 4 | Connect the Charger | Insert the charging connector fully into the device or battery charging port, then connect the adapter to a suitable wall outlet. | Check whether the charging indicator, display, or light activates. | Charging Started | Stop if there is sparking, excessive heat, smoke, or a burning smell. |
| 5 | Monitor the Charging Indicator | Use the device display or indicator light to track the charging state. Indicator colors and symbols vary by model. | A flashing or pulsing indicator commonly means charging; a steady or changed indicator may mean charging is complete. | Progress Monitoring | Follow the model-specific indicator guide rather than assuming one color code applies to every device. |
| 6 | Allow the Battery to Charge Fully | Leave the charger connected for the time specified in the device manual. Charging time varies with battery capacity, remaining charge, temperature, and charger output. | Watch for the full-charge indication and ensure the battery remains only mildly warm. | Full Charge Indicated | Do not cover the device or place heavy objects on the cable while charging. |
| 7 | Disconnect After Charging | Once charging is complete, unplug the adapter from the wall outlet and then remove the connector from the device. | Confirm that the indicator changes to the completed or standby state. | Ready for Use | Pull the connector by its plug, not by the cable. |
| 8 | Store the Battery Properly | For longer storage, keep the device in a cool, dry location and avoid leaving the battery completely empty for extended periods. | Check the battery periodically for swelling, leakage, corrosion, or unusual odor. | Stored Safely | Stop using and seek proper battery-recycling guidance if the battery is damaged or swollen. |
| 9 | Troubleshoot a Charging Problem | Try a different wall outlet, reseat the connector, clean dry contacts carefully, and allow an overheated device to cool before retrying. | If there is no indicator after these checks, consult the model manual or qualified service support. | Inspection Needed | Do not open, puncture, crush, or attempt to repair the lithium-ion battery yourself. |
Place the massager and charger on a cool, dry surface before connecting them. Check the cable for cuts, bent pins, or loose connections. Use the approved charger and connect it firmly to the charging port. The battery indicator should light up or display a charging symbol. Some models show several bars, while others use changing colors. Read the device manual because indicator meanings can differ. Do not rely on guesswork.
Check the battery status after several minutes, not immediately. A nearly full battery may change slowly. When the indicator shows full, or charging stops according to the manual, disconnect the charger. Unplug it from the wall first, then remove the connector from the device. This reduces unnecessary strain on the port. Avoid pulling the cable. Hold the plug instead. It is a small habit, but it protects the connection.
Tips: Keep the charger away from water, heat, and soft bedding. Do not charge a swollen, cracked, or unusually hot battery. If the light remains unchanged, stop charging and inspect the connections again. I used to assume a dark indicator meant a full battery, but that can be wrong. A short second check is safer than relying on one unclear light. Before storage, confirm the battery level and leave the device disconnected.
Proper battery care begins after charging, not when the cable is removed. Use the supplied charger or a compatible replacement with matching voltage. Place the device on a hard, dry surface with clear airflow. Avoid charging on beds, sofas, or inside a closed bag. Stop using it if the battery becomes swollen, unusually hot, cracked, or smells strange. Never cover the charger during operation.
I used to leave my massage device fully charged for weeks. That habit seemed harmless, but it may reduce long-term battery capacity. For regular use, charge it before the battery becomes completely empty. After charging, disconnect the cable instead of leaving it plugged in overnight. Keep the battery away from direct sunlight, heaters, and freezing temperatures. A cool, dry cupboard works better than a hot car.
For storage lasting several weeks, leave the battery partly charged, around 40 to 60 percent. Check it every two or three months. Recharge it briefly if the level becomes very low. Do not store the device with a wet attachment or damp cloth nearby. Moisture can reach small openings and cause problems later. I still sometimes forget this check, which is a useful reminder that maintenance needs a routine. If charging becomes inconsistent, stop guessing and consult the product manual or a qualified service professional.